

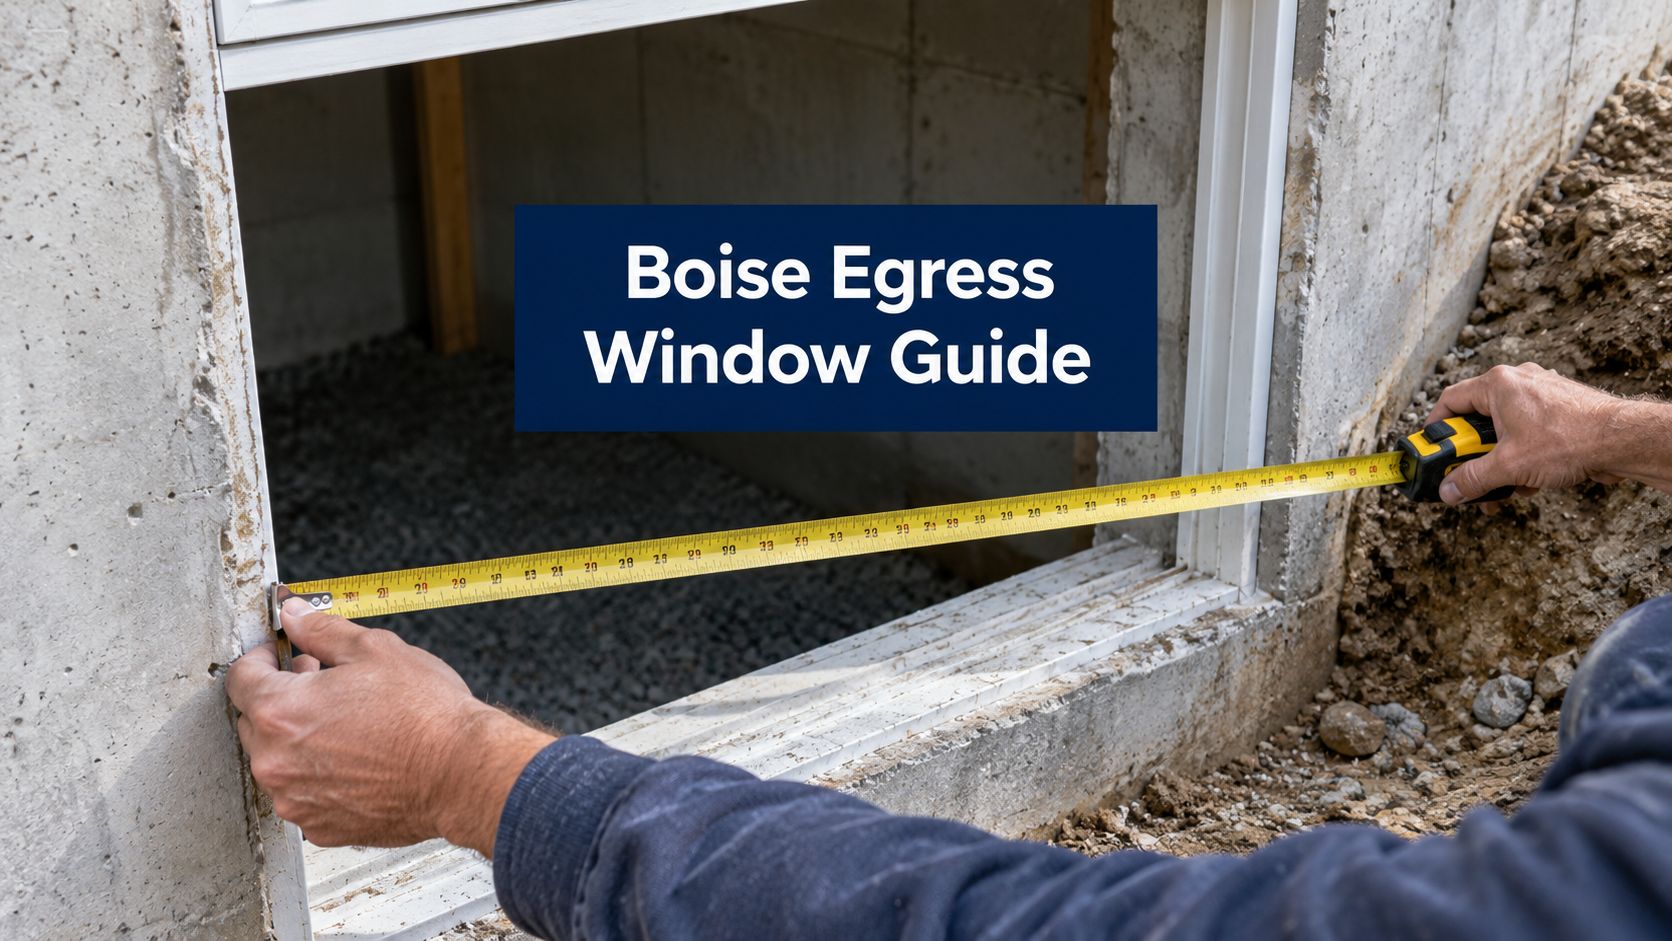
You've got a Boise basement with good ceiling height, usable floor space, and a plan for a legal bedroom. Then the window question stops the remodel: the existing basement window is too small, the sill sits too high, and the exterior wall is below grade. Egress window installation in Boise is more than replacing glass. It can involve structural concrete cutting, excavation, drainage, a window well, permits, and an inspection based on the actual opening someone could use in an emergency.
The right approach starts before anyone breaks concrete. Boise's measurements, Idaho's sleeping-room rules, site conditions, and the difference between an unfinished basement and a finished retrofit all affect the design. This guide lays out the practical path, from code review and budgeting to installation and final inspection, for homeowners across Boise and the Treasure Valley.
Table of Contents
- Your Boise Basement Project Starts with Safety and Code
- Understanding Boise Egress Window Requirements
- The Egress Window Installation Process from Start to Finish
- Budgeting Your Boise Egress Window Project
- DIY vs Professional Installation The Stakes for Your Home
- Why Choose C & C Windows & Doors for Your Boise Project
Your Boise Basement Project Starts with Safety and Code
A homeowner may see an unfinished Boise basement as a future bedroom, guest suite, rental area, office, or playroom. The plan changes once someone intends to sleep there. The window must function as a dependable emergency escape and rescue opening, rather than primarily providing more daylight.
Boise's guidance applies the same basic egress principles to basement and bedroom projects. Every sleeping room needs at least one operable escape opening, and a below-grade opening needs a compliant window well. The opening has to work from inside the room. The City of Boise egress-window handout provides a useful local reference before you select a window or finalize the design.
Window labels can mislead. A unit that appears large in a showroom may offer a much smaller clear passage after accounting for the sash, operator, frame, and interior trim. Measuring only the product or rough opening can leave you with a noncompliant result after concrete cutting and framing are complete.
Practical rule: Design the opening and the well as one system. Treating the window as a standalone product is an easy way to underestimate the work.
Why local planning matters
A basement retrofit can involve the foundation wall, exterior grade, drainage, insulation, interior framing, and finished flooring. The proposed location may also encounter buried utilities, a footing, patio concrete, or limited side-yard access. Those conditions belong to the property and require an on-site review rather than a generic checklist.
Permit planning should start before demolition. Cutting a new foundation opening is structural work, and converting a basement area into a bedroom involves more than fitting a larger window. Confirm who will prepare drawings, coordinate the permit, schedule inspections, and document the completed opening.
The project budget also depends on access and site conditions. A crew may need to excavate through compacted soil, remove concrete, manage spoils, alter drainage, and restore the exterior after installation. Discuss those items before signing a proposal, because a low window-only price may exclude the work that makes the opening safe and inspectable.
Homeowners comparing installers can review why licensed window installation matters in Boise before choosing a company. Licensing and professional accountability do not remove every complication, but they provide a clearer process for measurements, structural coordination, permitting questions, and inspection corrections.
A properly planned installation protects the future occupant and the house. It reduces water-intrusion risk and helps keep a finished basement from becoming an expensive rework project.
Understanding Boise Egress Window Requirements
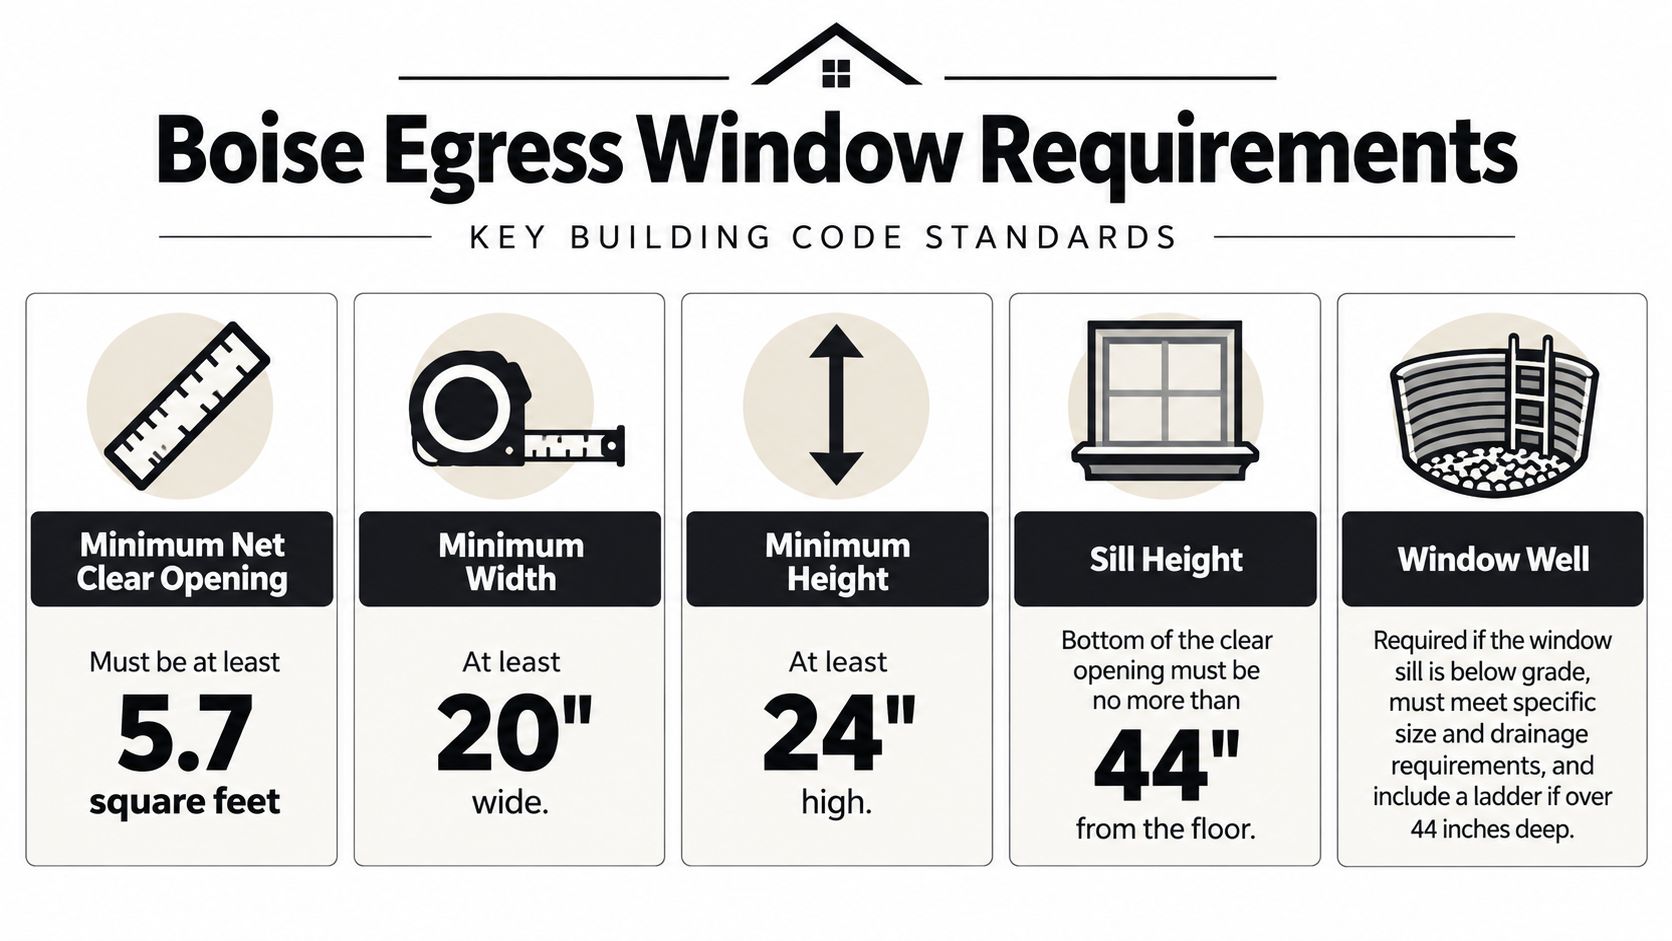
A basement window can look large enough and still fail inspection. The measurement that controls the decision is the net clear opening, meaning the unobstructed passage available when the window is fully open. It is different from the foundation's rough opening, the exterior frame size, and the glass area. Boise's adopted code handout specifies the following requirements: 5.7 square feet for a rescue opening, with 5.0 square feet allowed for a grade-floor or below-grade opening, along with minimum width, height, and sill limits, as shown in the City of Boise code handout.
For a basement bedroom, verify every measurement together:
- Clear opening area: At least 5.7 square feet, or 5.0 square feet for a grade-floor or below-grade opening.
- Clear height: At least 24 inches through the open aperture.
- Clear width: At least 20 inches through the open aperture.
- Sill height: No more than 44 inches above the finished floor.
- Window well: Required for a below-grade opening, with adequate room for access, drainage, and escape.
Boise measurements at a glance
| Requirement | Measurement |
|---|---|
| Minimum net clear opening | 5.7 square feet, with 5.0 square feet allowed for grade-floor or below-grade openings |
| Minimum clear width | 20 inches |
| Minimum clear height | 24 inches |
| Maximum sill height | 44 inches above finished floor |
These dimensions must work at the same time. A window may meet the width requirement and still fail because its clear height is too short. Apparent glass area also does not guarantee compliance if the sash, operator, or hardware reduces the passage once opened.
Check the product, not just the label
Request the manufacturer's actual net-clear-opening information before ordering. Casement, awning, sliding, and double-hung windows produce different usable openings, while hardware and interior trim can reduce clearance. Compare those product measurements with the proposed rough opening and the Boise window installation service information, rather than relying on a product label that only says “egress.”
Boise's code history explains why these details are specific. The 1964 Uniform Building Code called for an emergency exit and rescue opening in sleeping rooms, with at least 5 square feet of openable area and a sill no higher than 48 inches. The 1976 update raised the openable-area minimum to 5.7 square feet, lowered the maximum sill height to 44 inches, and required operation without tools, according to this history of egress-window requirements.
The Egress Window Installation Process from Start to Finish
A professional installation is a small construction project, not a routine window swap. The work has to connect the inside finish, foundation opening, exterior well, drainage, waterproofing, and inspection requirements into one coordinated sequence.
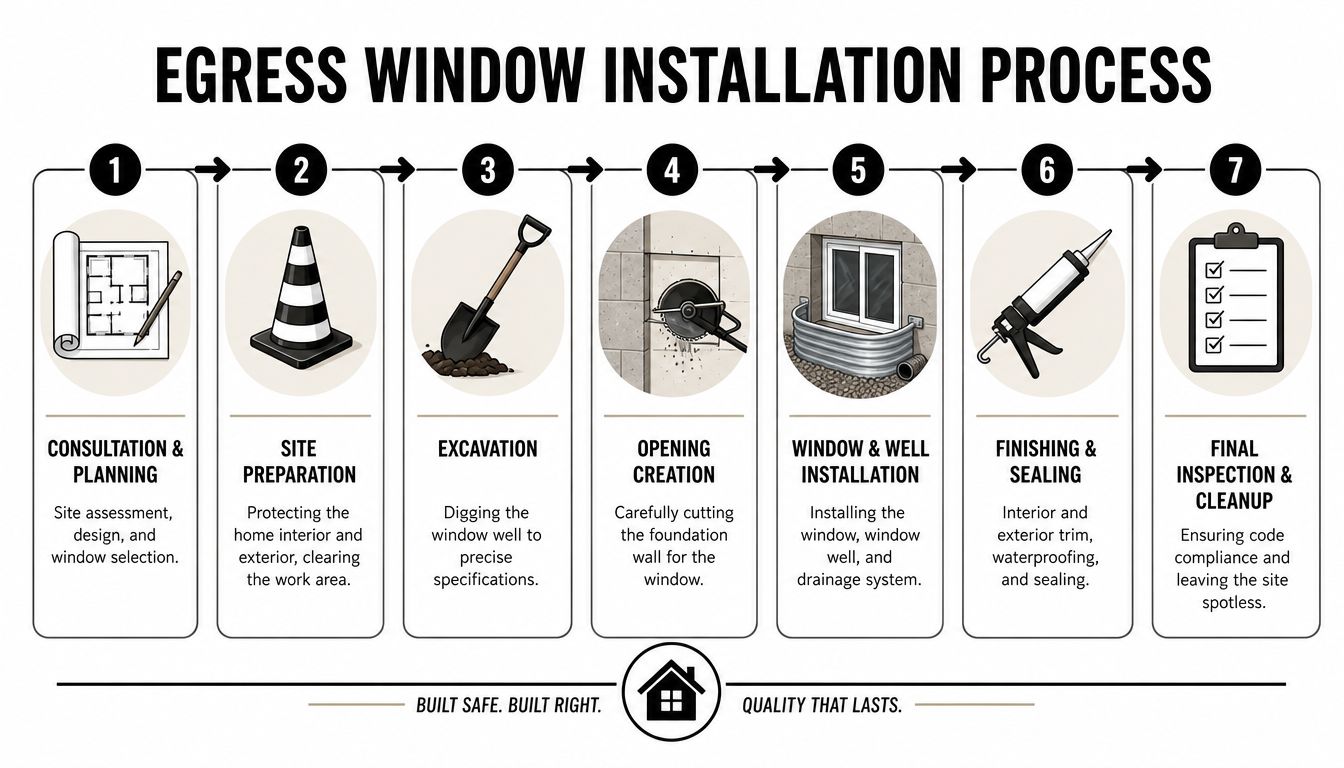
Seven phases that shape the job
Consultation and planning
The installer evaluates the basement layout, finished-floor elevation, foundation wall, exterior grade, access, and potential conflicts. The window type is selected only after the required clear opening can be confirmed.Site preparation
The crew protects floors, walls, furniture, landscaping, and nearby exterior surfaces. Interior and exterior work zones need separate preparation because concrete dust and excavated soil can travel well beyond the immediate opening.Excavation
The soil is removed to create the window well and provide working room around the foundation. The excavation must account for the finished well, drainage path, wall opening, and safe access for the crew.Opening creation
The foundation wall is carefully marked and cut. This phase demands control, because an inaccurate opening can affect the window fit, waterproofing, interior trim, and structural review.Window and well installation
The window is set, secured, insulated, flashed, and sealed. The well is installed outside, with drainage planned so water doesn't collect against the foundation or enter through the new opening.Finishing and sealing
Interior framing, drywall returns, trim, exterior sealing, and waterproofing bring the opening into the finished wall. The installer should also verify that the sash operates fully and that trim doesn't obstruct the clear aperture.Final inspection and cleanup
The project is checked against the approved plan and applicable Boise requirements. The work area should be left clean, with debris removed and the homeowner shown how the window and well operate.
Details that affect inspection
The opening must operate from inside without keys, tools, or special knowledge. For a deeper well, a permanent ladder or steps are required when the well depth exceeds 44 inches, according to Idaho installation guidance from Carter Built Construction. That requirement should be resolved during design, not improvised after excavation.
Drainage deserves equal attention. A window well that holds water defeats the purpose of a carefully sealed opening. The installer should explain where water goes, how the well connects to the site drainage strategy, and how the exterior grade will shed water away from the foundation.
A well is part of the escape route and part of the waterproofing system. It has to perform both jobs.
Homeowners should ask for a written scope that identifies concrete cutting, soil removal, well material, drainage, flashing, interior restoration, permit coordination, and cleanup. If those items aren't clear, the quote may not describe the complete project.
Budgeting Your Boise Egress Window Project
There isn't one honest price for every Boise basement egress project. A new opening in an unfinished basement can have a very different scope from a retrofit through a finished room, even when the selected window is similar. The major cost difference often comes from the work around the product.
Idaho rules require sleeping rooms to have an emergency egress window operable from inside without tools, while an approved exit door can substitute in some circumstances, as described in the Idaho administrative rule for emergency egress. That means the first budgeting question shouldn't always be “Which window is cheapest?” It should be “What legal escape option fits this layout with the least disruptive construction?”
What drives the estimate
| Project factor | Why it changes the scope |
|---|---|
| Window selection | Different operating styles provide different usable apertures, hardware arrangements, and finish requirements. |
| Foundation cutting | Concrete thickness, access, dust control, and cutting method affect labor and site protection. |
| Excavation | Soil conditions, side-yard access, haul-out requirements, and the depth of the well can change the work substantially. |
| Window well | The well must fit the opening, support safe escape, and handle water instead of directing it toward the foundation. |
| Drainage | The existing site may need a new or improved drainage solution around the below-grade opening. |
| Interior finishing | A finished basement may require removal and replacement of drywall, insulation, flooring, trim, and paint. |
| Permit and inspection coordination | Plans, applications, revisions, and scheduling add administrative work that an informal window replacement doesn't require. |
An unfinished basement often gives the crew easier access to the foundation and fewer finished surfaces to protect or rebuild. A finished basement may involve carefully removing wall sections, preserving electrical or mechanical work, rebuilding the room after installation, and matching existing finishes. That's why two quotes can differ dramatically without either contractor making an error.
Read a quote by scope
A low initial figure may cover only the window and basic installation. A complete proposal should identify whether it includes excavation, concrete cutting, structural treatment, waterproofing, well installation, drainage, interior restoration, permits, inspections, disposal, and warranty coverage.
For broader planning, homeowners can use this guide to understand Boise window replacement cost factors, while remembering that a basement egress project includes construction work beyond an ordinary replacement window.
Don't compare bids by the window price alone. Compare the complete path from finished floor to exterior grade, including what happens if the well is deeper than expected, the soil is difficult to remove, or inspection requires a correction.
DIY vs Professional Installation The Stakes for Your Home
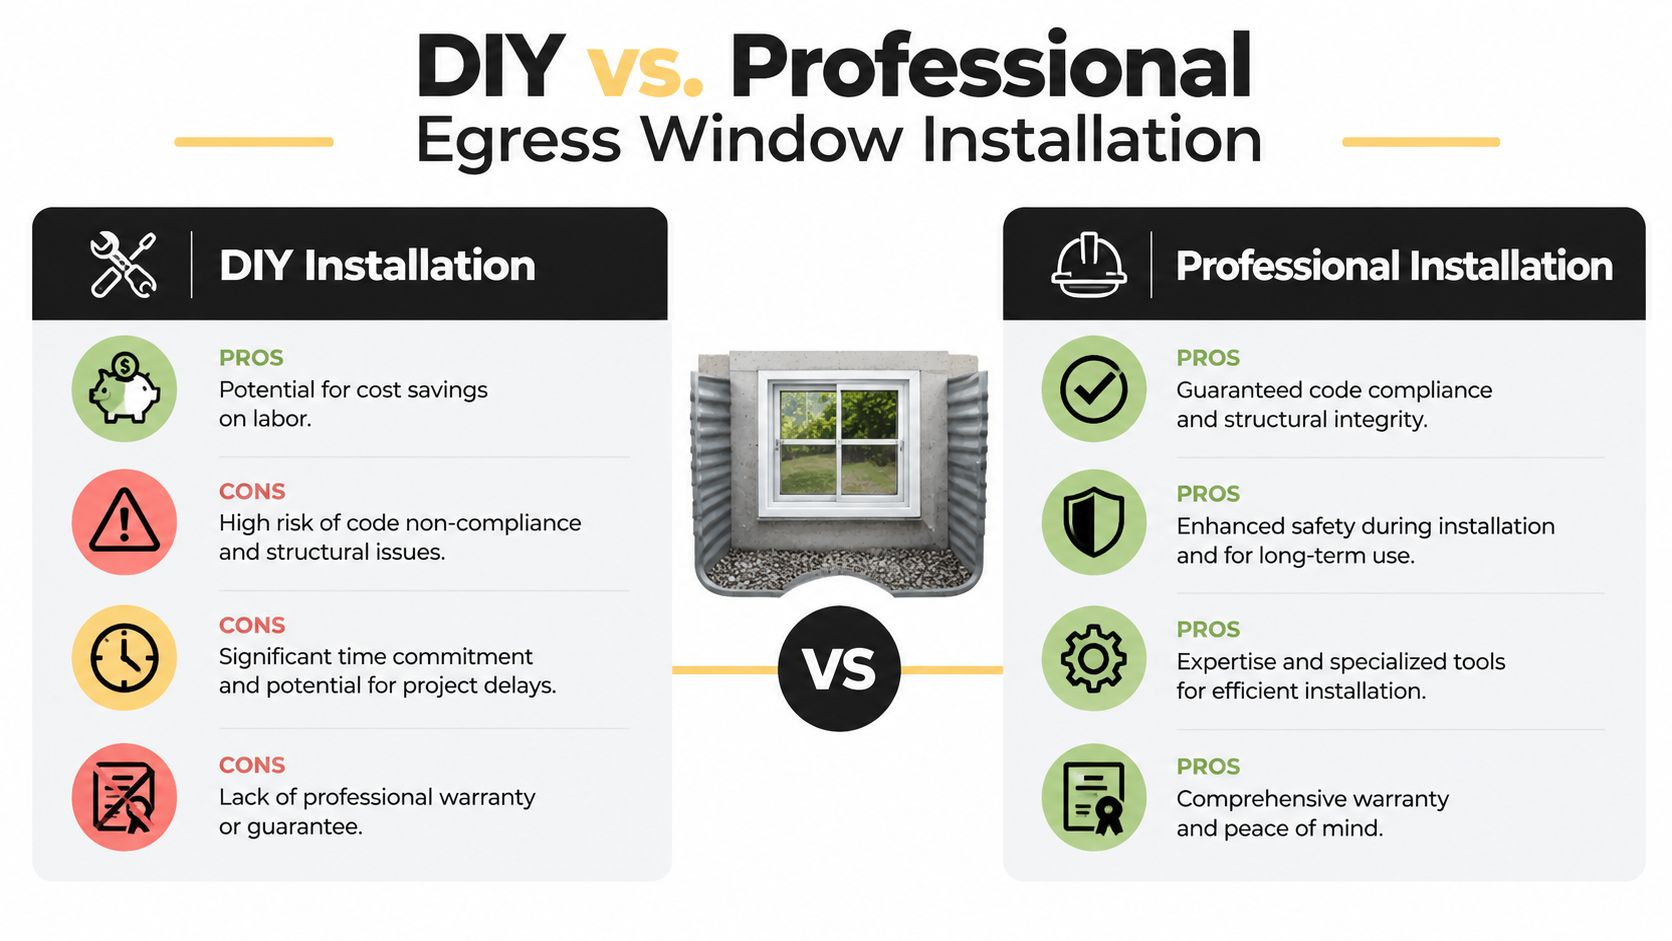
DIY can appear attractive because it may reduce labor expense and give a capable homeowner direct control over the schedule. The calculation changes once the project involves a foundation wall, below-grade drainage, structural opening dimensions, waterproofing, and a bedroom that must pass inspection.
A homeowner with concrete-cutting experience, excavation equipment, construction knowledge, and time may understand parts of the work. That still doesn't make the project equivalent to replacing a window in an existing opening. The installation has several points where a small error can create a large repair.
Where DIY can go wrong
- Code measurement: Measuring the frame or glass instead of the fully open aperture can leave the sleeping room without a compliant escape opening.
- Structural work: Cutting a foundation wall without the right plan, equipment, or sequence can damage concrete and create problems around the opening.
- Water management: Poor flashing, inadequate sealing, or a badly drained well can allow water into the wall and basement.
- Project control: Excavated soil, concrete slurry, dust, and interior demolition require more containment and cleanup than many homeowners expect.
- Warranty exposure: Product and labor coverage may be limited when installation doesn't follow the manufacturer's requirements or a professional installer's process.
The professional route costs more in labor, but it transfers critical responsibilities to a team that can measure the opening, coordinate the construction sequence, and document the finished work. It also gives the homeowner one party to contact when the window, well, seal, or interior finish needs attention.
The cheapest installation is the one that doesn't require opening the wall twice.
A practical decision test
DIY may be reasonable for limited preparation, such as clearing personal belongings, confirming the desired room layout, or completing paint after the construction is approved. Foundation cutting, well excavation, waterproofing, and code-sensitive installation deserve a higher level of control.
If you compare a professional installer such as C & C Windows & Doors with a self-managed project, focus on the written scope rather than the sales pitch. Ask who measures the net clear opening, who handles permits, how the installer protects the foundation, what drainage method is proposed, and what warranty applies to products and labor.
Why Choose C & C Windows & Doors for Your Boise Project
A Boise egress project needs a partner who understands that the window is only one part of the result. The finished installation has to fit the room, operate easily, resist Idaho weather, manage water at the foundation, and satisfy the applicable inspection requirements.
C & C Windows & Doors is a Treasure Valley-based installer with 20+ years of local experience, a factory-trained team, and a process built around in-home consultation and custom measurement. For an egress project, that measurement discipline matters because the required opening is based on the usable aperture after operation, not the marketing size printed on a product page.
The company offers energy-efficient window options engineered for Idaho's climate, including casement, double-hung, picture, and sliding designs. Performance features can include ClimaTech Low-E coatings, Argon gas fills, and optional triple-pane glass, with product options identified as meeting ENERGY STAR 7.0 compliance. Those features don't replace egress planning, but they can support comfort and efficiency once the opening has been designed correctly.
What the homeowner should expect
A useful consultation should address the full installation, not just the unit displayed in a catalog. Discuss:
- Custom measurements: Confirm the rough opening, finished-floor relationship, sash operation, trim allowances, and net clear opening.
- Project coordination: Establish who handles permits, inspections, concrete work, excavation, well installation, drainage, and interior restoration.
- Installation quality: Look for careful protection of the home, accurate placement, sealing, flashing, and debris removal.
- Product support: Ask about the lifetime limited warranty on products and labor, and request the coverage terms in writing.
- Payment planning: Financing through Synchrony may be available, subject to applicable terms and approval.
- Consultation format: Free in-home consultations and same-day estimates can help define the scope before construction begins.
A good installer also knows when a window isn't the only practical option. If an approved exterior door or a different bedroom layout can provide a compliant escape route with less foundation disruption, that alternative deserves discussion. The right solution is the one that meets the safety requirement while respecting the home's structure, drainage, finish level, and budget.
C & C Windows & Doors serves Boise and nearby Treasure Valley communities, including Meridian, Eagle, Nampa, Caldwell, Kuna, Garden City, and Star. Homeowners should bring their basement plans, existing window dimensions, finish details, and concerns about access or water to the consultation so the estimate reflects the actual work.
C & C Windows & Doors offers free in-home consultations, custom measurements, energy-efficient window options, and meticulous installation planning for Boise-area egress projects. Visit C & C Windows & Doors to discuss your basement opening, window well, permit needs, and a complete installation estimate.