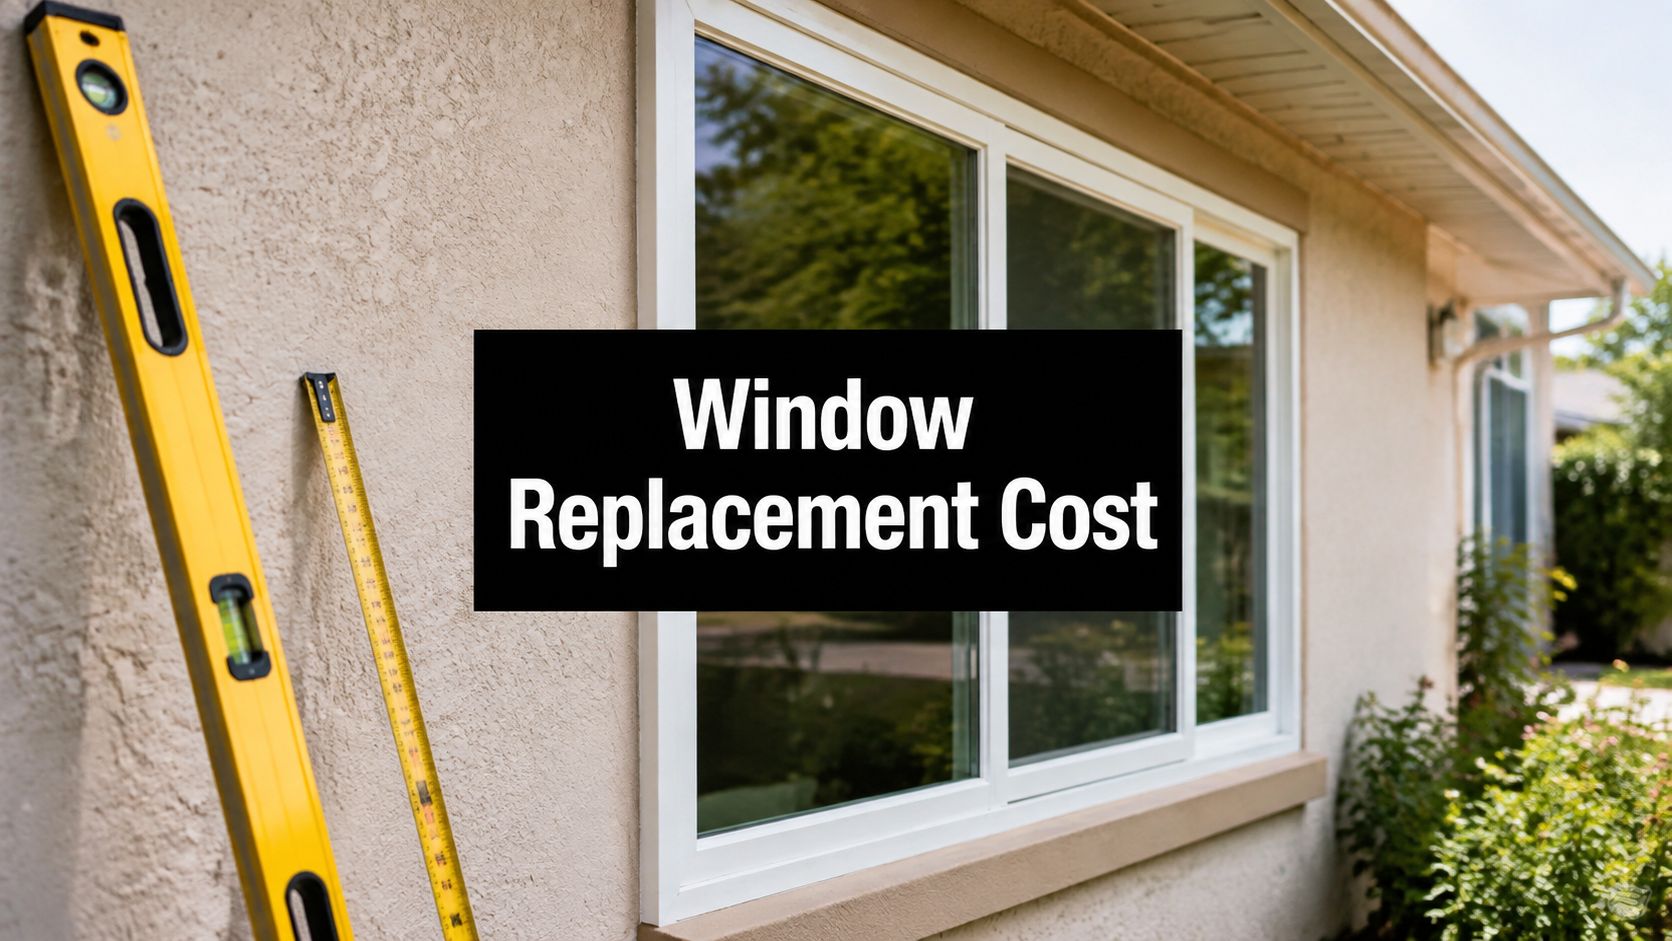
Most Tri-Cities homeowners should expect to pay roughly $600 to $1,050 per window installed for a typical replacement, and $11,400 to $17,100 for a full whole-home project. Window type and product tier can push that range past $2,800 per opening.
You're probably looking at two quotes right now, both claiming to include installation, haul-away, and energy-efficient glass. One may be several thousand dollars higher than the other, yet the pages look almost identical. That difference usually comes from the window line, installation method, glass package, and the condition of the opening, not from some mysterious Tri-Cities surcharge.
National calculators blur Kennewick, Richland, Pasco, and West Richland into a statewide average. That's not useful enough for a homeowner making a real decision. Local labor, older ranch-home framing, stucco repairs, second-story access, and the product mix commonly selected in the Columbia Basin all affect the final number.
Table of Contents
- What Most Tri-Cities Homeowners Actually Pay
- The Four Cost Drivers Behind Every Window Quote
- Window Materials and How They Move the Price
- Breaking Down Materials, Labor, Permits, and Upgrades
- Real Per-Window and Whole-Home Cost Examples
- Energy Efficiency and the Tri-Cities Climate Zone
- What the Replacement Process and Timeline Look Like
- Financing Options and Incentives Worth Knowing
What Most Tri-Cities Homeowners Actually Pay
A Kennewick or Richland homeowner comparing quotes for standard replacements should start with $600 to $1,050 per opening installed. Washington pricing data places the Yakima, Pasco, Richland, and Kennewick region in that range, while statewide pricing runs roughly $600 to $1,200. Tri-Cities work generally sits near the lower end of Washington's urban market. Review the regional comparison in this Tri-Cities window replacement cost guide.
For a whole-house project, $11,400 to $17,100 is a practical Washington benchmark when the scope includes several openings, upgraded materials, custom sizing, or installation complications. Another Washington estimate puts a 12-window replacement between $6,540 and $22,680, showing why one average price can mislead. Simple openings and economical products drive the low end. Premium specifications, difficult access, and major repairs drive the high end. (Washington replacement window pricing data)
Where typical projects land
Standard vinyl and fiberglass replacements usually fall in the middle of the market. Older Richland ranch homes often cost more after frame removal exposes damaged jambs, failed sill areas, or deteriorated sheathing. Newer Pasco subdivisions can price lower when openings are uniform and an installer can use an insert replacement without disturbing nearby finishes.
Specialty units belong in a separate category. Bays, bows, garden windows, and oversized picture windows can rise well above standard opening prices, especially when exterior trim must match or framing needs modification. Premium Washington installations can reach $1,200 to $2,800 or more per window. (Washington window cost benchmarks)
Use these questions to compare bids accurately:
- What window is included? Confirm the manufacturer, series, operation, frame material, and glass package.
- What installation method is included? Insert replacement and full-frame tear-out are different scopes of work.
- What repairs are assumed? Ask whether trim, stucco, siding, drywall, and rotten framing are included.
- What happens if the crew finds damage? Get the repair rate and approval process in writing.
A lower quote may be legitimate, or it may exclude work your house needs. Check the scope before comparing totals. Tri-Cities labor and product choices deserve a local comparison, not a statewide average alone.
The Four Cost Drivers Behind Every Window Quote
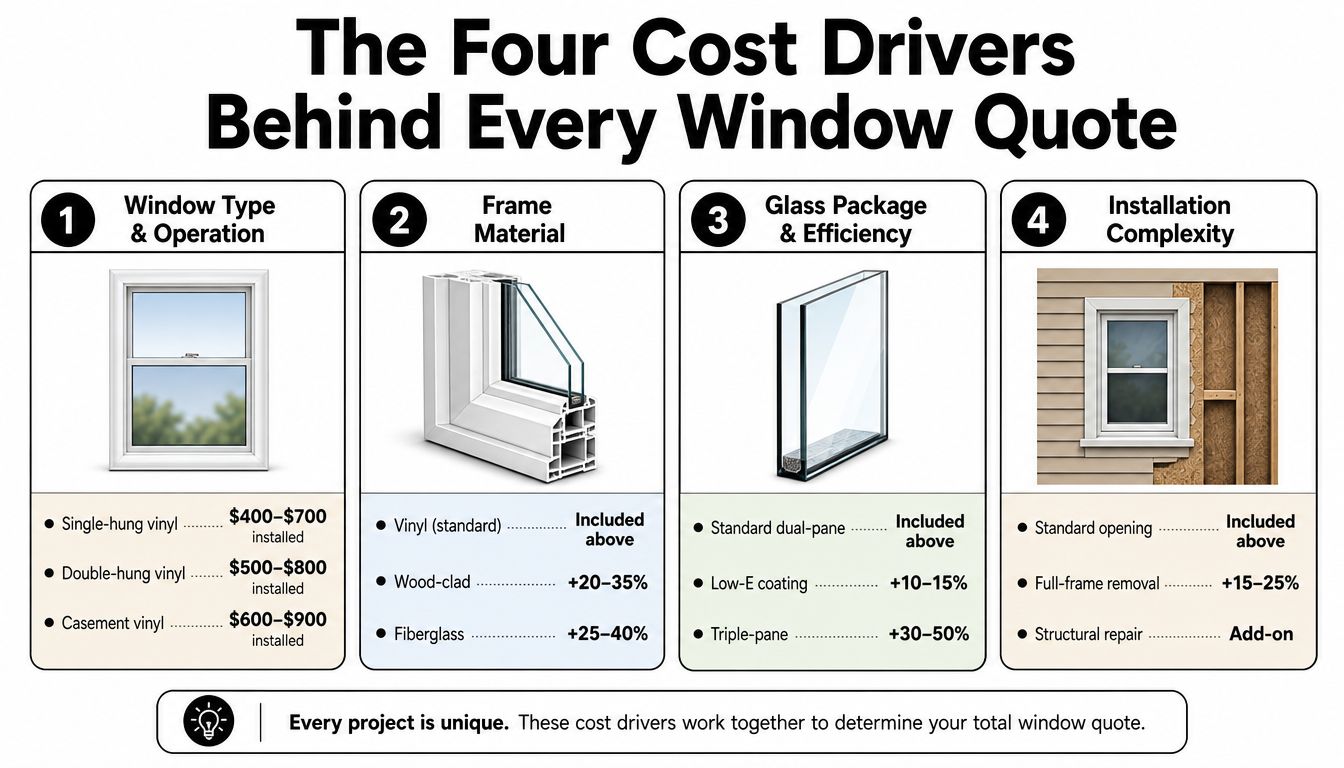
Every Tri-Cities estimate moves on four levers. If you understand them, you can read a bid without guessing why one contractor is higher.
Window type and operation
A fixed picture window has fewer moving parts than a casement, awning, or double-hung unit. Operating hardware, locking points, sash weight, screen design, and the amount of weatherstripping all affect the installed price. A large casement or awning window generally takes more careful adjustment than a basic replacement unit because the operator and seals must work smoothly after installation.
Frame and glass package
Vinyl usually gives homeowners the lowest entry point, while fiberglass, composite, wood, and clad-wood products raise the material cost. Glass can move the quote just as sharply. Low-E coatings, argon fills, warm-edge spacers, acoustic laminates, and triple-pane construction each change the specification.
A contractor should write those choices on the estimate, not describe them with a vague phrase such as “high-efficiency glass.”
Practical rule: If the quote doesn't name the window series and the whole-window performance rating, you're comparing sales language rather than products.
Scope of work
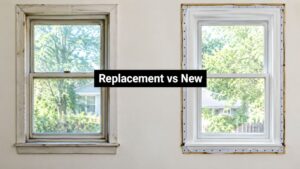
An insert replacement preserves much of the existing frame. A full-frame replacement removes the old unit and exposes the opening, which can reveal rot, inadequate flashing, or framing problems. On stucco ramblers in Kennewick and Richland, exterior patching and trim integration can become a meaningful part of the job.
Site complexity
A single-story rectangle with clear access is straightforward. A second-story opening over a patio, a window behind landscaping, or a unit in a tight stairwell takes more preparation and more labor. Older homes may also require lead-safe work practices during removal, depending on the age and condition of the existing painted components.
A useful bid separates each driver into a line item. Look for the window unit, glass package, installation method, removal, disposal, exterior finish work, interior repairs, and any allowance for concealed damage. If the contractor combines everything into one “complete replacement” figure, ask for a revised estimate before signing.
Window Materials and How They Move the Price
For a standard Tri-Cities opening, material choice sets the starting point, but the window's size, exposure, and installation method determine how far the quote moves. Choose based on your maintenance tolerance, how long you expect to stay, and whether the opening takes strong afternoon sun.
Vinyl remains the practical volume choice. Washington contractor pricing places vinyl double-hung windows around $400 to $800 installed, depending on product quality and site conditions. A sound midrange vinyl unit fits standard bedrooms, rentals, and repeated openings. Builder-grade products may cost less, while premium vinyl with stronger frames, better hardware, and upgraded glass runs higher. (Washington installed window cost by type)
Fiberglass costs more and earns that premium in demanding openings. Washington references place fiberglass double-hung windows around $600 to $1,100 installed. The frame resists shape changes and suits large units, exposed elevations, and homeowners focused on long-term stability rather than the lowest initial price.
Wood carries the highest maintenance burden among these common choices. Wood double-hung windows are commonly estimated at $800 to $1,400 installed in Washington. Clad-wood adds exterior protection while keeping the wood interior, but custom sizing, stain-grade finishes, and detailed trim can raise the total sharply.
Match the material to the opening
Premium brands can reach $1,200 to $2,800 or more installed per window when the order includes custom dimensions, specialty shapes, premium glazing, or difficult access. (Washington whole-project window pricing)
Do not specify the same product for every opening. Put stronger frames and better glass in large, sun-exposed, hard-to-reach windows or prominent front elevations. Use a dependable midrange unit in ordinary openings once it meets the project's performance target. That approach fits Tri-Cities homes better than copying Seattle-oriented showroom packages, where product selections and labor conditions can push pricing higher.
Ask the contractor to identify the reason for every price increase. The difference should show up in the frame, glazing package, hardware, custom finish work, or installation scope. If the explanation is only “premium quality,” request the series name and written specifications, then compare another bid.
Breaking Down Materials, Labor, Permits, and Upgrades
A clean window bid should let you trace the total from the opening to the finished room. Materials commonly represent 45% to 55% of the job, including the window, glazing package, frame finish, hardware, grilles, exterior trim, and related flashing materials. That portion deserves a product description detailed enough for you to verify later.
Labor is separate. Tri-Cities contractor guidance lists local window labor around $50 to $75 per hour, and competitive labor rates can still produce a wide installed-price range when access or repairs complicate the work. (Tri-Cities labor cost guidance)
Request these bid categories
- Window units: Manufacturer, series, dimensions, operation, interior and exterior colors.
- Glass package: Dual-pane or triple-pane construction, Low-E coating, gas fill, and performance ratings.
- Installation: Insert or full-frame method, flashing, shims, insulation, sealants, and exterior weatherproofing.
- Removal and disposal: Whether old windows, packaging, and damaged materials leave the property.
- Repairs: Rot, sheathing, framing, stucco, siding, drywall, casing, and paint touch-ups.
- Permits: Who determines whether a permit is needed and who pulls it when framing changes.
Permit requirements depend on the work and the local jurisdiction. A simple unit replacement may be treated differently from a project that changes structural framing or enlarges an opening, so don't accept a contractor's casual assurance that permits never apply.
Energy upgrades should also appear separately. A Low-E coating, argon fill, foam-filled frame, or triple-pane package can be worthwhile, but you need to see the added cost and the resulting whole-window rating. Don't pay for an upgrade you can't identify on the NFRC label or product documentation.
Bid-reading rule: Never approve a broad allowance for “miscellaneous labor” when the contractor can describe the expected work. Allowances hide uncertainty. Clear unit prices expose it.
Real Per-Window and Whole-Home Cost Examples
A worked example is more useful than a statewide average. Consider a 1990s Kennewick rambler with 10 standard openings, vinyl double-pane Low-E units, white interiors, and no structural changes. A project like that may land around $7,800 to $10,500 total, or $780 to $1,050 per opening installed, when the openings are accessible and the crew can work without extensive finish repair.
The total rises when the contractor uses a higher product tier, removes the existing frames, repairs concealed damage, or adds specialty shapes. The number also changes when the homeowner selects upgraded colors, grilles, hardware, or glass. The point isn't to force every quote into the same range. It's to identify what a contractor must explain when the price sits outside it.
A more involved Richland project
Now consider a two-story Richland home with 12 to 15 windows, mixed sizes, a large picture window above the entry, fiberglass frames, triple-pane glass, and full-frame tear-outs. The project may reach $16,500 to $28,000, with second-story work, the large picture unit, premium frames, glass, and matching exterior trim carrying much of the difference.
That example should include haul-away but exclude interior paint touch-ups. A quote that includes painting, drywall finishing, or extensive interior casing would need to show those costs separately. You can use this Kennewick window replacement cost resource when checking whether a local estimate explains its scope clearly.
Use these scenarios as a sanity check, not a substitute for measurements. The contractor should verify every opening, confirm the installation method, and document any condition that could change the price.
A good quote answers three questions without a sales call:
- What exact product am I buying?
- What exact work will the crew perform?
- What conditions would create a change order?
If those answers aren't written down, the total isn't ready for comparison.
Energy Efficiency and the Tri-Cities Climate Zone
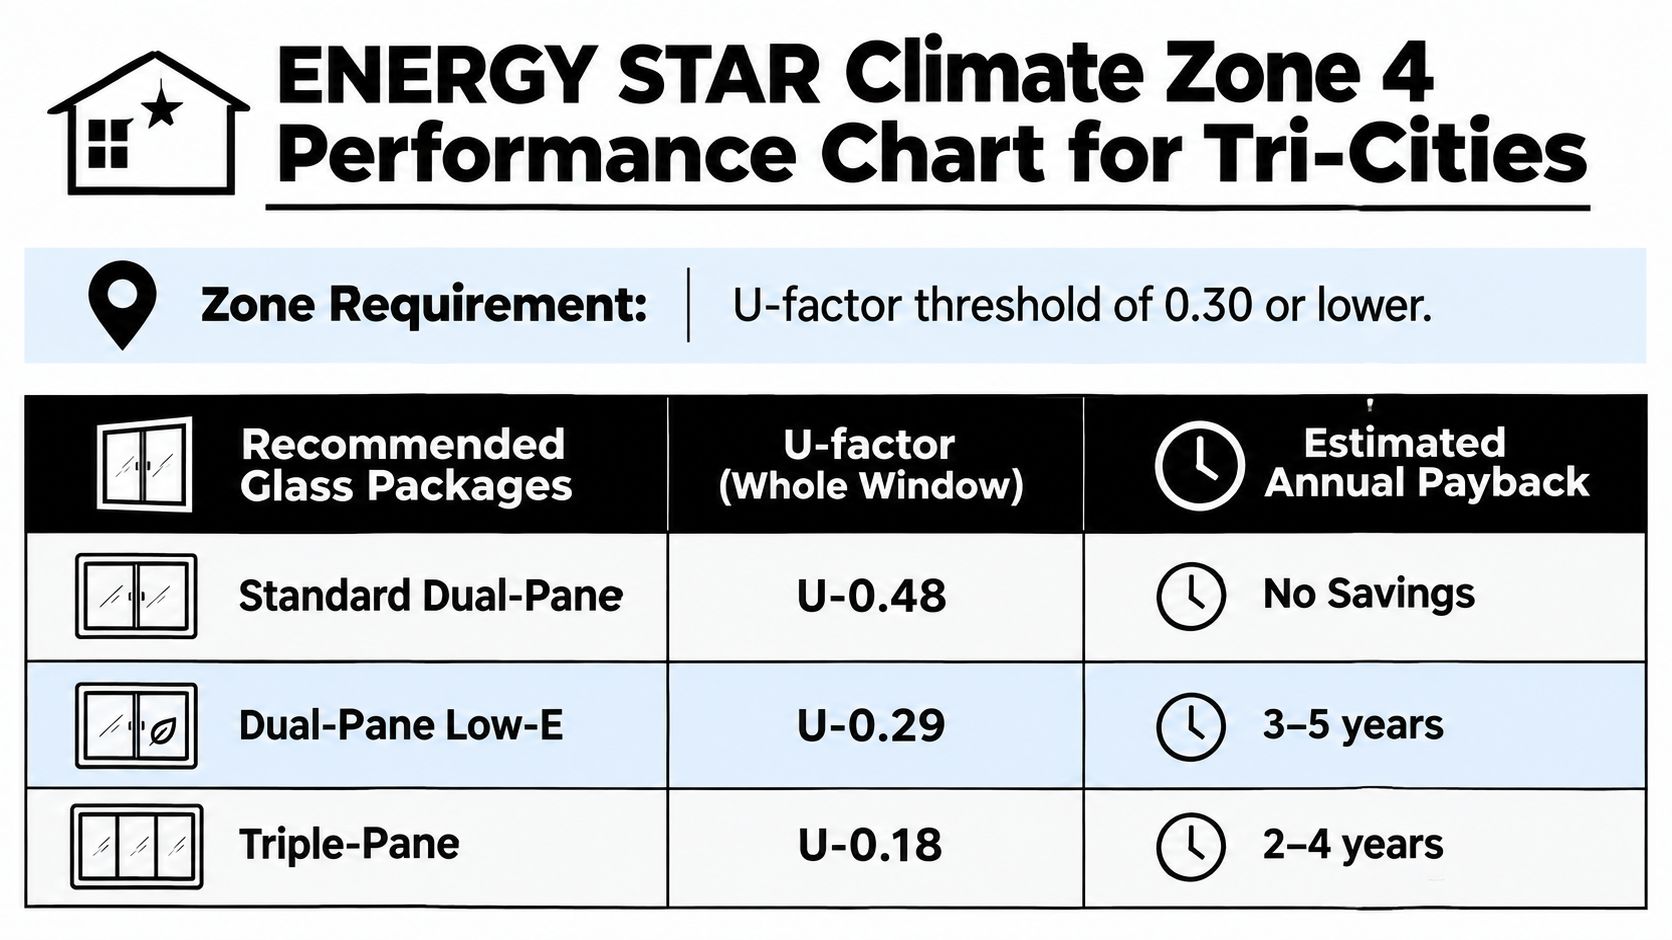
A window that performs well in Seattle is not automatically the right choice for Kennewick, Pasco, or Richland. Start with ENERGY STAR's climate-zone guidance, selecting the state and county before comparing products. That step keeps the recommendation tied to the Tri-Cities climate zone instead of a generic Washington average.
For inland Northwest homes, one relevant ENERGY STAR v7.0 benchmark is a whole-window U-factor of 0.22 or below for Northern-zone products. U-factor measures heat transfer through the complete window assembly, so a lower rating generally indicates better insulation. Review it with solar heat gain, window orientation, shading, and the room's comfort issues. The Pacific Northwest window performance guidance provides regional context for these ratings.
When the upgrade makes sense
Replacing old single-pane windows with ENERGY STAR-certified double-pane units can save an average household about $125 to $465 per year in energy costs, according to the cited guidance. That range helps frame the payback discussion, but it does not make premium glass the right choice for every opening.
Prioritize upgrades in rooms with drafts, cold glass, strong sun exposure, or traffic noise. Better glass can also improve temperature consistency, condensation control, and noise reduction.
Ask for the NFRC label or official performance documentation. Compare U-factor and SHGC for each window, rather than relying on “energy efficient” brochure language. In the Tri-Cities, a capable double-pane Low-E package is usually the practical middle ground. Triple-pane glass belongs in the most exposed rooms when the comfort improvement justifies its higher price, not as a default requirement.
What the Replacement Process and Timeline Look Like
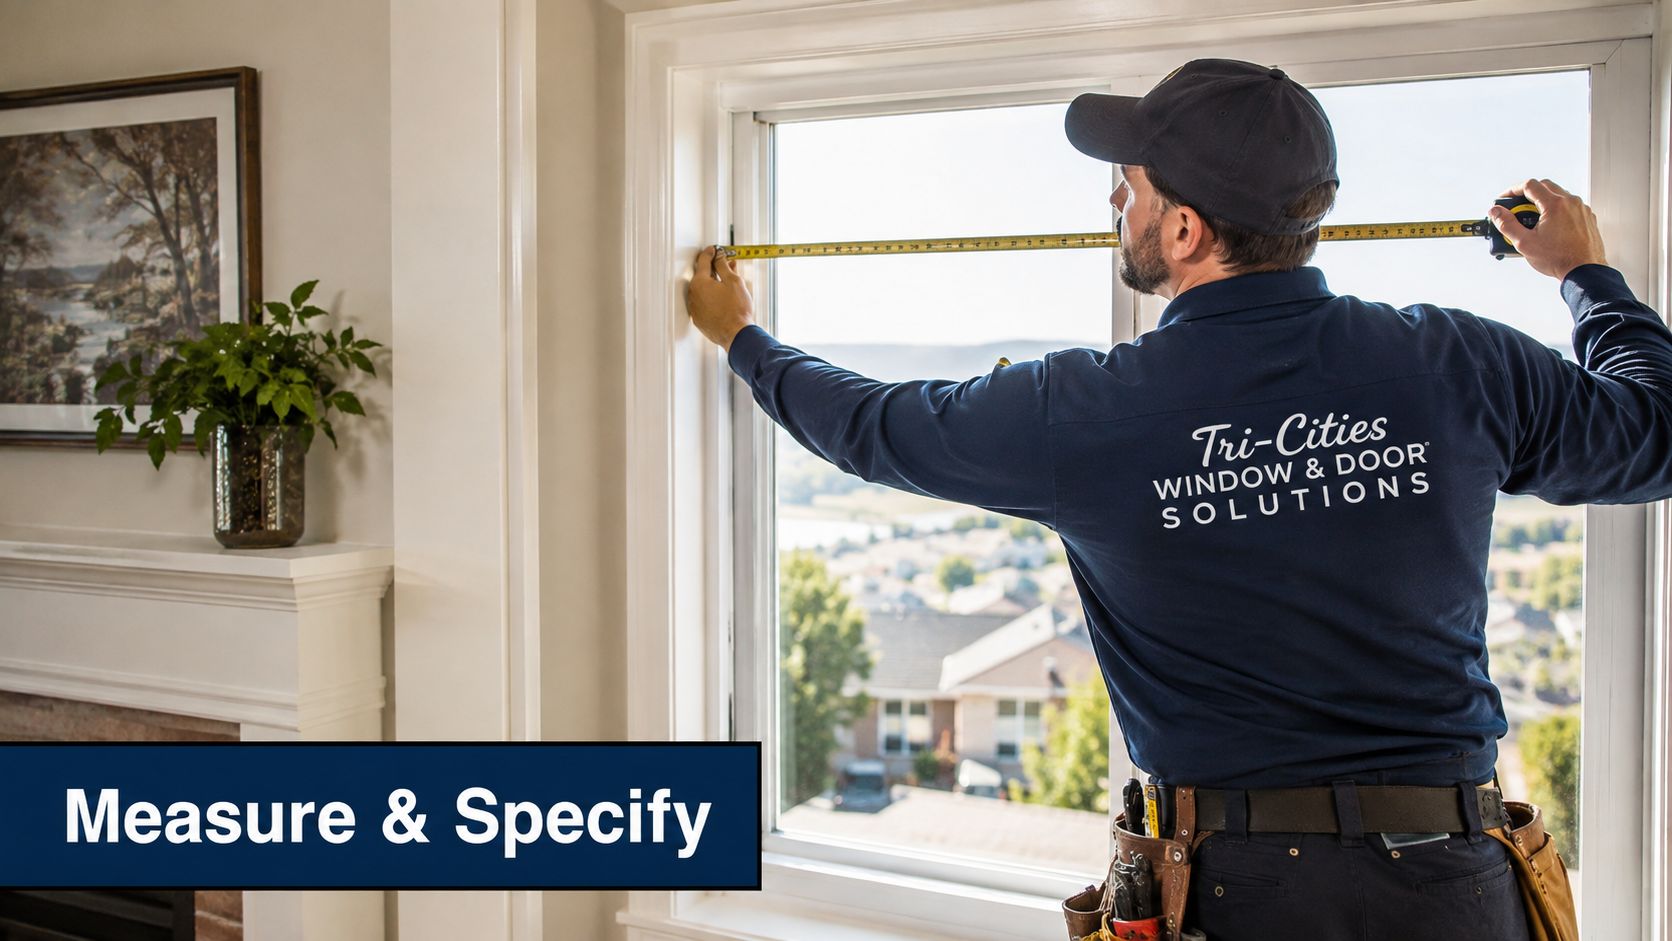
A reliable window replacement starts with a detailed measurement, not a tablet presentation. During the first visit, the installer should record width, height, depth, square, sill condition, trim, exterior finish, operation, and access. The conversation should also cover the actual problem. Drafts, failed seals, difficult-to-open sashes, water entry, and poor comfort can require different products or installation methods.
Before the order
Use a second appointment to confirm the exact product, frame color, glass package, grille pattern, hardware, screens, and installation method. This is the point where small changes become expensive. Switching from white vinyl to a custom exterior finish after ordering can create a delay, restocking issue, or revised price.
Require written product details and confirmation that the measurement is final. A sample corner and a verbal promise that the new window will “look about the same” are not enough. The quote should identify the window line, frame type, glass, finish, and work included around each opening.
Installation day
A straightforward 10-window project generally takes one to two days, depending on crew size, access, weather, and finish work. The crew should protect floors and nearby furniture, remove only the openings they can weatherproof that day, and keep the home secure as each window is removed and reset.
For every opening, the installer should:
- Protect the room: Use floor coverings, moving protection, and a controlled route for debris.
- Remove the old unit: Take out the sash or complete frame according to the contracted installation method.
- Inspect the opening: Check for rot, moisture damage, inadequate shims, or framing problems.
- Set and square the replacement: Shim correctly and confirm that the sash operates without binding.
- Weatherproof the assembly: Install flashing, insulation, backer materials, and sealants specified for the project.
- Finish the opening: Reinstall or replace trim, casing, brickmold, coil, stucco interfaces, or siding details.
Drywall and trim damage often appears after removal, rather than during the sales visit. The contract should state how concealed repairs are priced, which repairs are included, and who must approve added work.
Walkthrough and follow-up
The same-day walkthrough should cover operation, locks, screens, glass, caulk lines, trim, cleanup, and unfinished punch-list items. Record defects while the crew is still present. Cleanup and adjustment are part of a finished installation, not optional extras.
Hot, dry Tri-Cities summers can stress sealants and reveal small finish problems after installation. A follow-up conversation within 30 to 90 days gives the homeowner time to report sash-adjustment concerns, sealant movement, or trim details that still need attention.
Scheduling reality
Custom fiberglass orders can take four to eight weeks. Unusual grille patterns and other special-order components may extend that period. During the busiest summer stretch, local installers may carry a six- to 10-week queue from July through September. Ask for the current production estimate in writing before approving the order.
A standard 10-window vinyl project ordered between March and June might follow this sequence:
- Week one: In-home measurement and needs assessment.
- Week one or two: Product and finish confirmation, followed by order approval.
- Following weeks: Manufacturing, delivery coordination, and site preparation.
- Installation window: One to two days for removal, setting, weatherproofing, and cleanup.
- After installation: Same-day walkthrough, followed by service contact if adjustments arise.
Do not schedule around an installer's optimistic verbal estimate. Get the expected order date, delivery window, installation dates, and procedure for handling damaged or backordered units.
Vet the contractor locally
Start with Washington paperwork. Request current L&I contractor registration and active liability and workers' compensation insurance certificates sent directly from the carrier. A Kennewick, Richland, or Pasco business address should be verifiable. The contractor should also explain which permits were pulled for comparable Benton or Franklin County projects.
Ask for three Tri-Cities references from jobs completed within the last 18 months, and drive past at least one property if the homeowner agrees. Require an itemized bid listing window units, labor, hauling, permits, rot repairs, brand, model, U-factor, and SHGC.
Red flags include:
- Same-day pressure: A discount that disappears before you can compare the paperwork.
- Large upfront demand: Requests for more than a third of the total before work begins.
- Bundled pricing: A vague “house wrap” line combining labor, materials, repairs, and disposal.
- Product ambiguity: A contractor who cannot name the window line in the written quote.
Ask three final questions: Who measures? Who installs? What happens if a sash fails under warranty? Clear answers show whether you are hiring an installation team or dealing with a lead-generation sales operation.
Financing Options and Incentives Worth Knowing
Financing can make sense when the project solves an urgent comfort or water-intrusion problem, but it shouldn't turn an unclear bid into an affordable-looking monthly payment. Start with the cash price, then compare the financing cost separately.
Contractor-offered plans through companies such as Synchrony or GreenSky may be available, with terms ranging from 12 to 144 months depending on the program and approval. Read the APR, promotional-period conditions, deferred-interest language, fees, and consequences of missed payments. Longer terms reduce the monthly payment while increasing the total cost of the project.
Home-equity products and personal lines from local credit unions such as HAPO and Gesa may offer another route. A cash-out refinance is a larger decision and deserves particular caution when the project total is high, because refinancing can alter the rate and repayment cost on the entire mortgage, not just the windows.
Check incentives before ordering
The federal Energy Efficient Home Improvement Credit may provide 30% of qualifying ENERGY STAR material costs, up to $600 per opening, with a $1,200 annual cap, according to the cited replacement-window guidance. A separate $2,000 heat-pump-and-envelope credit may apply when qualifying windows are bundled with insulation or a heat-pump project. Verify current eligibility, documentation, and tax liability with the IRS or a qualified tax professional before treating a credit as guaranteed. (Replacement-window tax credit guidance)
Tri-Cities homeowners should also check available utility programs connected with BPA, Energy Trust of Oregon, and Cascade Natural Gas weatherization offerings. Eligibility depends on the home, utility account, equipment, and program rules. Don't assume a rebate applies because a window carries an ENERGY STAR label.
Your action list is straightforward:
- Request a line-item bid: Separate materials, labor, permits, hauling, repairs, and energy upgrades.
- Confirm permits: Ask who handles Benton or Franklin County permits when structural openings change.
- Verify performance: Match the product line and U-factor to the applicable climate-zone guidance.
- Compare on-site quotes: Get at least two detailed measurements before signing.
The cheapest bid is rarely the best choice when warranty support, flashing, crew experience, and concealed repairs determine whether the installation performs properly.
C & C Windows & Doors provides free in-home consultations, custom measurements, and professional window and patio-door installation, with energy-focused product options and itemized project guidance. Visit C & C Windows & Doors to discuss your Tri-Cities replacement project and request a quote that clearly separates the product, installation, and performance upgrades.