
If you're feeling a cold draft near the living room window before the furnace even kicks on, you're not imagining it. In Boise, that first stretch of frosty mornings usually exposes every small gap you ignored in September. The house feels uneven. One room is comfortable, another feels chilly. Condensation starts showing up on the glass, and the heating bill heads in the wrong direction.
Preparing your Boise home windows for winter isn't just about sticking plastic on the glass and hoping for the best. Boise homes deal with a specific mix of winter conditions: freeze-thaw cycles, wind, cold nights, cloudy stretches, and enough sunshine to make solar gain worth thinking about. That combination changes what works, what only works temporarily, and when patching is no longer worth your time.
Table of Contents
- Why Winterizing Windows Is Critical in Boise
- Your Pre-Winter Window Inspection Checklist
- Sealing and Insulating Common Window Leaks
- Advanced Winter Strategies for Treasure Valley Homes
- When to Stop Patching and Start Replacing
- Your Boise Window Preparation Timeline
Why Winterizing Windows Is Critical in Boise
A lot of Boise homeowners think of winter as manageable compared with harsher mountain climates. That's true to a point. But mild winters can be misleading because homes in the Treasure Valley still spend long stretches relying on heat, especially during cold nights and cloudy periods when the indoor temperature starts dropping fast.
Windows often sit at the center of that problem. According to the U.S. Department of Energy, residential windows can be responsible for roughly 30% of a home's total heating and cooling energy losses, and upgrading from older single-pane windows to modern ENERGY STAR-qualified units can reduce winter heat loss by up to 50% or more in situations like Boise homes with aging window stock (U.S. Department of Energy window guidance).
That helps explain why one drafty room can throw off the feel of the whole house. The issue isn't only energy loss through glass. It's also air leakage around frames, worn seals, weak locks that don't pull the sash tight, and caulk joints that have opened up after repeated freeze-thaw cycles.
Boise's winter pattern exposes weak windows
Boise winters create a steady stress test for older windows. Daytime sun warms materials up. Nighttime temperatures pull them back down. Those expansion and contraction cycles can open hairline gaps around trim, corners, and joints.
If your house has windows from the 1970s through the 1990s, those details matter even more. Older units often struggle with air tightness, surface temperature, and condensation control, even when the glass still looks decent from across the room.
Practical rule: If you can feel moving air with your hand near a closed window, the problem is already large enough to affect comfort.
There's also a budget side to this. The average U.S. household spent about 42% of its total residential energy consumption on space heating in 2020 to 2021, according to the U.S. Energy Information Administration data summarized in the verified material above. In a heating season, a weak window isn't a cosmetic issue. It's part of the operating cost of the home.
Comfort is usually the first warning sign
Most homeowners don't start with lab ratings. They start with symptoms:
- Cold seating areas: The room feels uncomfortable near the glass.
- Condensation on the interior: Moisture shows up on cold mornings.
- Uneven temperatures: Bedrooms differ from the main living space.
- Drafts during wind events: The house feels leakier on certain sides.
- Higher heating use: The furnace runs longer than expected.
If any of that sounds familiar, it's worth reading why your windows may be driving high heating bills in Boise. The root cause is often more straightforward than people think. Air leaks, poor glazing performance, or both.
Your Pre-Winter Window Inspection Checklist
Before you buy caulk, film kits, or weatherstripping, take a careful walk around the house. Good winter prep starts with diagnosis. Otherwise, people end up sealing the wrong area while the actual leak is still sitting at the frame corner or sash rail.
Start outside first
Exterior inspection tells you a lot. Boise's freeze-thaw pattern is hard on exposed sealants and trim joints, especially on sides of the house that take wind or direct sun. Inspectors recommend paying close attention to outside corners and trim around windows because these areas are especially vulnerable to moisture infiltration, decay, mold, and energy loss in freeze-thaw conditions (Boise winterization inspection guidance).
Walk the perimeter in daylight and look for these issues:
- Cracked caulk joints: Focus on top corners, side casing joints, and frame-to-siding transitions.
- Separated trim: Even a narrow opening can let in moisture and cold air.
- Soft wood or swollen material: Press lightly on suspect areas with a putty knife handle.
- Staining below the sill: Water may already be getting behind the trim.
- South-facing wear: UV exposure often dries out sealants faster on the sunnier sides of the house.
Bring a notepad or use your phone. Mark each window by room so you know where to return.
Check the interior like a technician would
Inside the house, don't just look at the glass. Operate every unit. Lock it. Open it. Raise it. Slide it. Crank it. If it drags, resists, or won't pull tight into the frame, that matters in winter.
Use your hand around the sash edges and meeting rails. A smoke pencil can help, but your hand will catch a lot on a cold morning. Also look for fogging between panes, which usually points to seal failure inside the insulated glass unit.
A window can look acceptable from ten feet away and still leak badly where the sash meets the frame.
Pay attention to hardware too. Loose locks, worn rollers, bent keepers, and stripped screws often show up first as "this window never closes quite right anymore." That's not a minor annoyance. In winter, it usually means the weatherseal isn't being compressed correctly.
What deserves a closer look
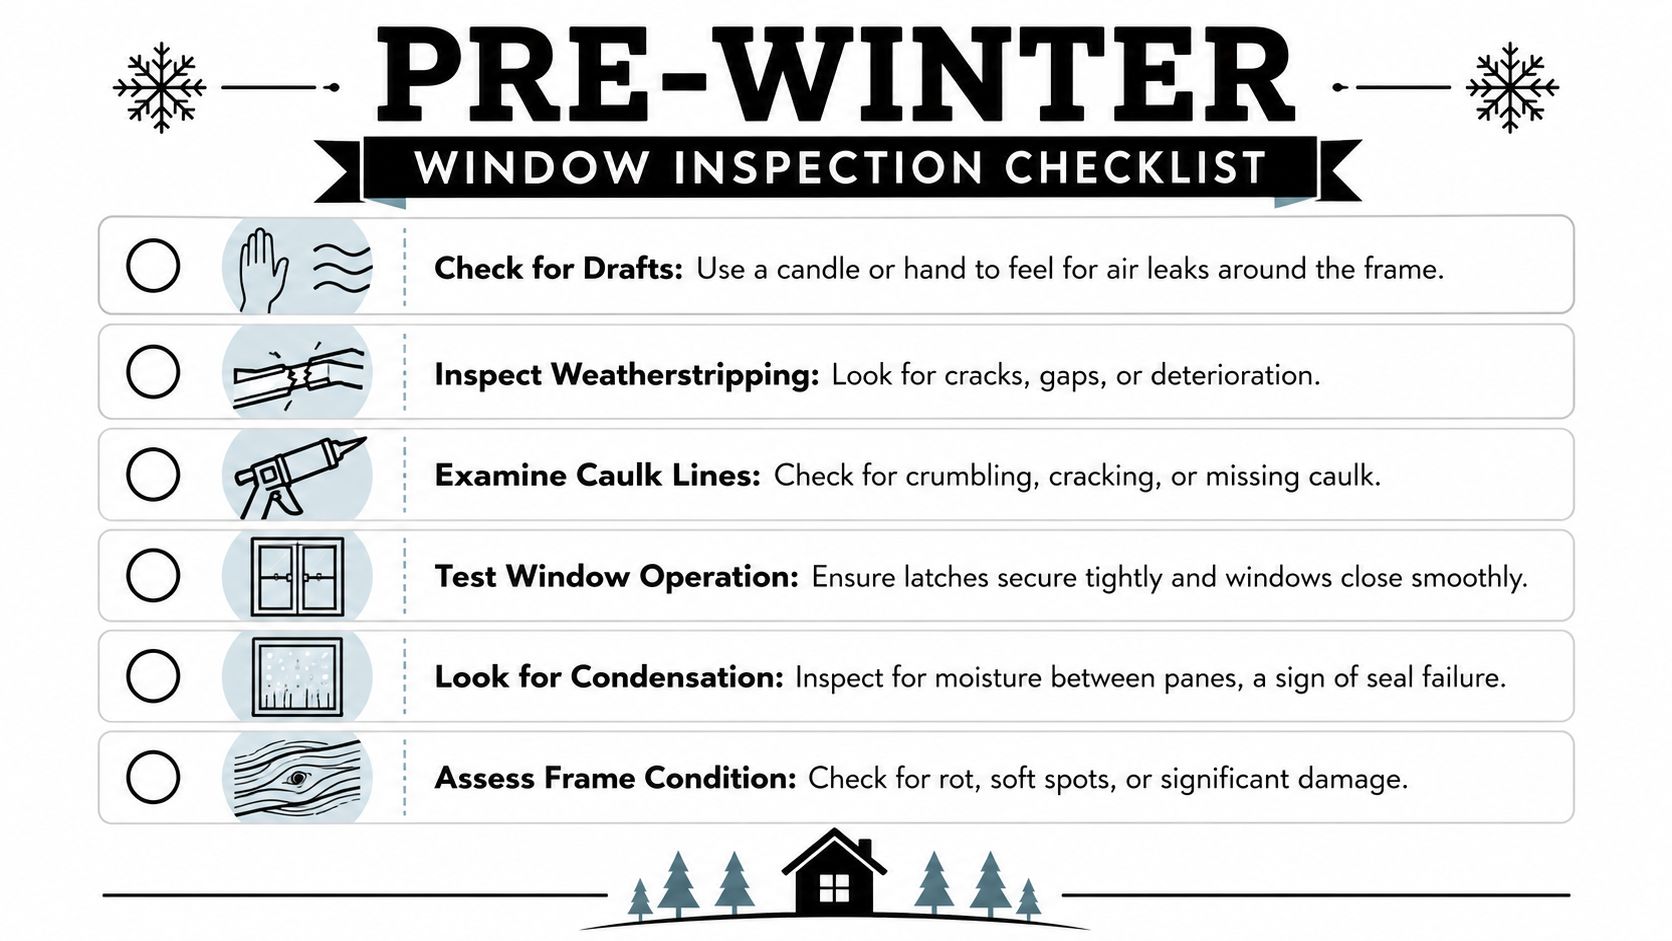
Use this checklist room by room:
- Draft check: Feel around the perimeter, stool, meeting rail, and latch side.
- Weatherstripping check: Look for flattened, torn, missing, or brittle material.
- Caulk line check: Note crumbling, gaps, shrinkage, or separation from the frame.
- Operation check: Confirm the sash closes smoothly and locks without forcing.
- Glass check: Look for moisture between panes or persistent interior condensation.
- Frame check: Watch for rot, staining, cracked paint, swelling, or movement.
A few findings usually point toward a simple seasonal fix. A long list on the same window often points toward a deeper window failure.
Sealing and Insulating Common Window Leaks
Once you've identified the trouble spots, start with the repairs that give the best return for the least disruption. In Boise, that usually means sealing the exterior perimeter, tightening up operable parts of the window, and using interior film or storm-style solutions where the window itself is still structurally serviceable.
Field testing by the U.S. Department of Energy shows that properly applied exterior caulk plus interior shrink-film kits can reduce conductive heat loss by 25 to 35%, and one of the biggest mistakes is using brittle acrylic caulk on exterior joints where temperature swings are hard on the seal (DOE-based winter window sealing guidance).
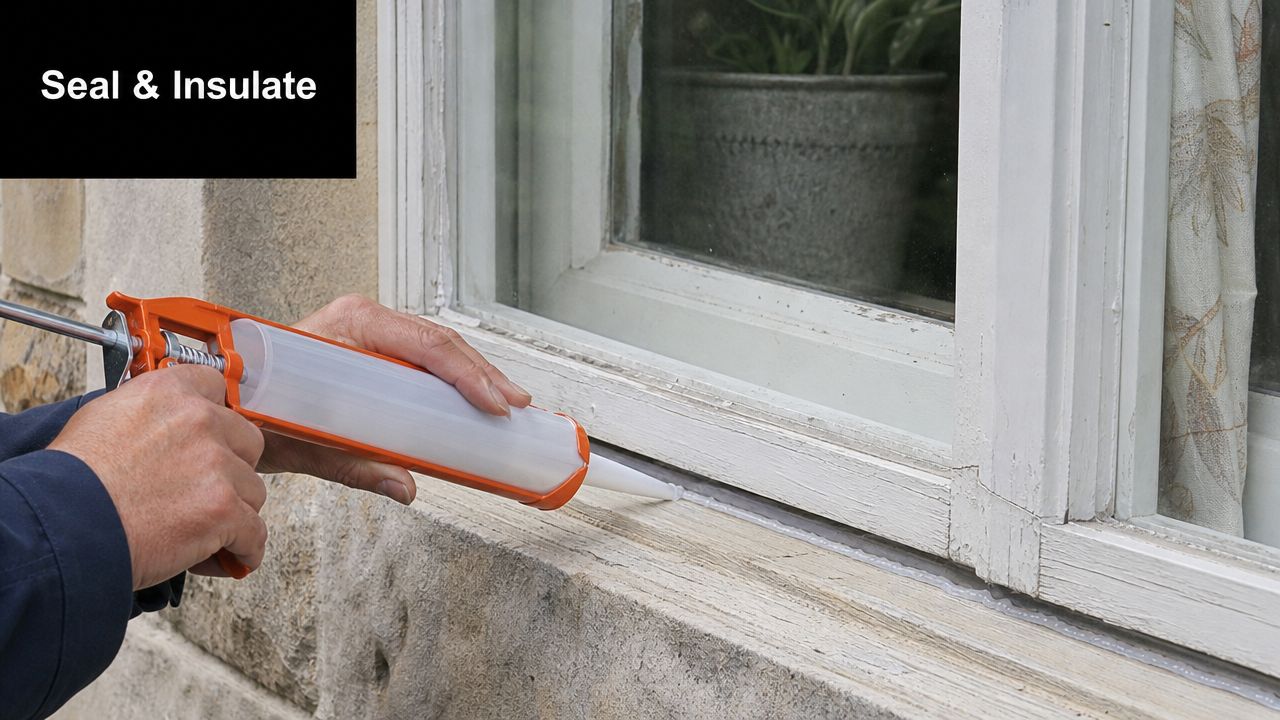
Re-caulk the exterior perimeter the right way
Many DIY jobs go sideways. Homeowners often add fresh caulk on top of failing material. That rarely holds through winter.
Use a putty knife or painter's tool to remove loose, cracked, or separated caulk. Clean the joint. Let it dry fully. Then apply a flexible exterior-grade silicone or polyurethane product rated for low temperatures. In Boise, flexibility matters because the joint will keep moving through the season.
A few trade-level rules help:
- Cut out failed material first: New sealant won't bond reliably to chalky or loose caulk.
- Seal the joint, not the drainage path: Don't plug intentional weep paths on the window.
- Tool the bead cleanly: A thin continuous bead works better than a lumpy oversized one.
- Wait for dry conditions: Damp joints lead to poor adhesion.
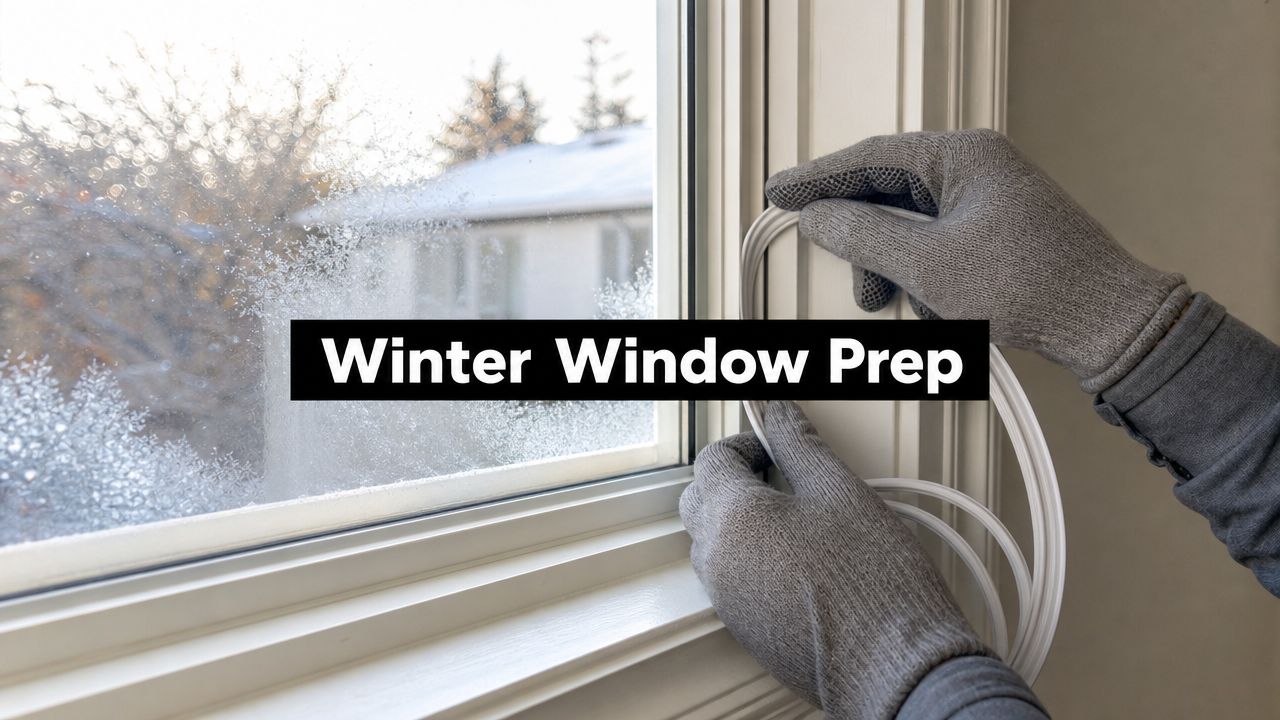
Replace weatherstripping where the sash actually leaks
Weatherstripping is often the fix when the frame is sound but the operable portion no longer seals tightly. Double-hung windows, sliders, and patio doors are common problem spots.
Match the replacement material to the window design. Don't guess. Bring a sample to the supplier if needed. Foam tape can help in limited situations, but many operable windows need a profile-specific weatherseal that compresses correctly when locked.
Look closely at:
- Meeting rails on double-hung units
- Latch side of casements
- Interlocks on sliders
- Bottom sweep areas on patio doors
If the sash is warped or the lock no longer pulls the unit into alignment, new weatherstripping won't fix the whole problem. It may improve things, but only temporarily.
Use shrink film as a seasonal fix, not a permanent answer
Interior shrink film is useful when you're trying to get through one more winter with older windows that still need replacement later. Installed well, it creates a still-air layer and cuts the cold draft sensation dramatically.
For the best result, clean the surface thoroughly, apply the tape continuously, and shrink the film evenly with controlled heat from a hair dryer. Don't overheat it. Aggressive shrinking causes wrinkles, weak adhesion, or torn corners.
If the film is doing all the work, the window already needs more than a tune-up.
Storm-style interior solutions can also help older single-pane windows. If you're seeing recurring issues on several openings, review how window seal failure shows up in Boise homes. It can help you separate a perimeter air leak from a failed glass unit or a worn-out frame.
Advanced Winter Strategies for Treasure Valley Homes
Basic sealing is only part of the job. The better winter approach in Boise also accounts for condensation behavior, sun exposure, and large glass areas that can either help or hurt comfort depending on how you manage them.
Handle condensation without guessing
Interior condensation doesn't always mean the window has failed. Sometimes it means warm indoor air is meeting a cold glass surface and dropping moisture there first. Bathrooms, kitchens, and bedrooms often show it earliest.
What matters is the pattern. A little moisture on very cold mornings can happen. Persistent moisture, puddling at the sill, black spotting on trim, or fog trapped between panes points to a bigger issue.
Try these practical adjustments:
- Reduce indoor moisture loads: Use bath fans and kitchen exhaust consistently.
- Keep air moving: Open interior blinds enough for room air to wash over the glass.
- Check room-specific problem windows: North-facing bedrooms often reveal issues first.
- Wipe sills dry promptly: Don't let standing moisture sit against paint or wood.
Use Boise winter sun to your advantage
Boise receives roughly 300 days of sunshine annually, which is why smart winter prep isn't only about sealing every opening as tightly as possible. South-facing windows can contribute useful passive solar warmth during the day if you let the sunlight in, then insulate that opening after sunset. Managed well, that approach can reduce overall heat loss by up to 10% while capturing free warmth (Boise winter sun and window covering guidance).
Many generic winterizing guides miss the mark. They treat every window the same.
For Treasure Valley homes, a better routine looks like this:
- South-facing windows: Open thermal curtains during sunny daytime hours. Close them at night.
- North-facing windows: Keep insulation-focused coverings closed longer.
- West-facing windows: Adjust by room comfort. Afternoon gain can help, but drafts still need control.
- East-facing windows: Morning gain is useful, though usually less impactful than south exposure.
On a clear winter day in Boise, sunlight is part of the heating strategy. At night, those same windows need insulation help.
Don't ignore large patio doors
Sliding patio doors are often the weak spot in an otherwise decent house. They have bigger glass area, more frame perimeter, and more opportunity for air movement at the interlock and track.
Check the fixed panel perimeter, moving panel alignment, lock engagement, and the condition of the bottom track. If the rollers are worn and the panel doesn't pull tightly into the jamb, you may keep feeling cold air no matter how much film you put on nearby windows.
Heavy drapes can help at night. During the day, use them selectively if the door faces a useful solar exposure. The same Boise trade-off applies. Capture warmth when it helps, then hold it in once the sun is gone.
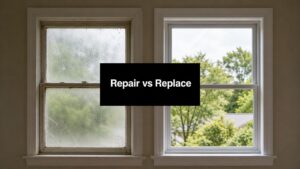
When to Stop Patching and Start Replacing
Some windows respond well to maintenance. Others are done. Knowing the difference saves time, money, and frustration.

Signs the window itself is the problem
If you're re-caulking the same area every season, the issue may not be the caulk. It may be frame movement, poor original installation, a failed insulated glass unit, or a window design that no longer performs at a reasonable level.
Replacement moves to the top of the list when you have:
- Permanent fog between panes
- Warped sash or frame components
- Rot or soft wood
- Windows that won't lock or operate correctly
- Visible air leakage despite repeated sealing
- Recurring condensation tied to very cold glass surfaces
- Multiple failures on the same unit
Those are end-of-life signs more often than maintenance signs.
What modern replacement windows do better
For Boise's climate, ENERGY STAR Climate Zone 5 compliance requires windows with U-factors of 0.30 or below, and modern double-pane low-E argon units in thermally broken frames can cut window-related heating load by 30 to 50% versus older windows when the product and installation are both done correctly (Climate Zone 5 window performance guidance).
That performance comes from several pieces working together:
- Low-E glass coatings reflect heat more effectively than older clear glass.
- Argon-filled insulated glass units improve thermal performance.
- Thermally broken frames reduce cold transfer through the frame itself.
- Better sash design and compression seals reduce air leakage.
- Improved drainage details help protect the opening over time.
For many Boise homes built in the 1970s through the 1990s, that's the difference between a room that feels drafty all winter and one that maintains a stable indoor temperature.
Installation quality matters as much as the glass
This is the part homeowners can't afford to overlook. The same source notes that poor installation can negate up to 25% of a window's rated efficiency. That's a major hit, and it's why replacement isn't just a product purchase. It's an installation job with building-envelope consequences.
A quality install depends on rough-opening prep, correct shimming, fastening without frame distortion, flashing integration, proper low-expansion foam use, and complete interior and exterior air sealing. If any of that is sloppy, the fancy glass package won't deliver what you paid for.
If you're weighing the decision, this guide on when to replace windows versus repair them is a useful next step. In practice, patching still makes sense when the frame is stable and the issue is localized. Replacement makes more sense when the whole assembly has become the weak point.
Your Boise Window Preparation Timeline
Good winter prep works best when it's done before the first hard cold snap. Waiting until the house already feels uncomfortable usually turns a manageable project into rushed weekend work.
Early fall
Use early fall for inspection and planning. Walk the exterior, operate every window, note problem rooms, and decide which issues are simple maintenance and which ones look structural or age-related.
This is also the right time to gather materials:
- Exterior-grade flexible caulk
- Backer rod if wider joints need support
- Replacement weatherstripping
- Shrink film kits
- Putty knife, rags, and cleaner
- A notepad with each window's issues by room
If a window is showing glass seal failure, frame movement, or major operation problems, get professional eyes on it before colder weather arrives.
Mid-fall
This is the work phase. Caulk dry joints. Replace worn weatherstripping. Apply shrink film to the windows that need a seasonal boost. Adjust your curtain routine based on orientation.
Do one final check on a cold morning:
- Feel for drafts
- Look for new condensation patterns
- Verify locks pull tight
- Inspect exterior corners and trim after the first weather swing
The best time to winterize a Boise window is before you need the furnace to cover for it.
DIY vs. Professional Window Winterization Tasks
| Task | Best for DIY | Best for a Pro (like C&C) |
|---|---|---|
| Exterior caulk touch-up | Small accessible gaps with sound trim and dry surfaces | Repeated joint failure, hidden moisture signs, or difficult access |
| Basic weatherstripping replacement | Straightforward worn seals on operable windows or doors | Hardware alignment issues, warped sash, or specialty seal profiles |
| Interior shrink film installation | Seasonal draft reduction on older but stable windows | Large numbers of failing windows where film only masks the problem |
| Hardware tightening | Minor loose screws or simple latch adjustments | Windows that still won't close, lock, or align correctly |
| Condensation troubleshooting | Managing room humidity and curtain use | Persistent moisture, fogged insulated glass, or suspected seal failure |
| Full window replacement | Not a DIY job for most homeowners | Best choice when the frame, glass, installation, and energy performance all need correction |
Preparing your Boise home windows for winter comes down to honest assessment. Seal what can still perform. Stabilize what just needs maintenance. Replace what has clearly reached the end of the road.
If you'd rather solve the problem permanently instead of patching through another winter, C & C Windows & Doors can help. They work with Treasure Valley homeowners on climate-appropriate replacement windows and patio doors, with in-home consultations, custom measurements, and professional installation designed for Idaho conditions.